The Best Ever Cherry Dump Cake
With only three ingredients, this The Best Ever Cherry Dump Cake cobbler-like dessert is a definite family favorite. Over the years, we’ve tweaked this classic recipe a bit to add a little more flavor but it is still easy peasy to make.

The Best Ever Cherry Dump Cake has a weird name but it sure is easy to make and tastes better than you would expect a cake that you mix together in less than five minutes would taste. It gets its’ name from the fact that you “dump” the ingredients straight into the pan and then bake. Easy Peasy. We’ve tweaked the classic cherry dessert recipe a bit over the years to enhance the flavor and boy is this a yummy cherry cake. We hope your family enjoys it as much as our family does.
Ingredients you will need

How to Make a Dump Cake

Step 1: Pour the cake mix into a mixing bowl and then add half the melted butter.
Step 2: Mix the cake mix and the butter until it is thoroughly combined.
Step 3: Spray a 9×13″ pan with cooking spray and then pour the contents of both cans of Cherry Fruit Filling into the bottom of the pan. Spread evenly.
Step 4: Sprinkle the cake mix/butter mixture evenly over the cherry filling.

Step 5: Melt the remaining butter and drizzle it over as much of the cake mix as you can.
Step 6: Bake the Cherry Dump Cake in a pre-heated 350-degree oven for 30-35 minutes or until the top is set and starting to get golden brown.
Step 7: Allow the cake to cool slightly before serving. Serve warm with a scoop of Ice Cream or Whipped Cream.
Expert Tips and FAQS
Store the Cherry Dump Cake covered in the refrigerator. It will last 2-3 days. We enjoy it best warm with Ice Cream, but I’ve been known to sneak a bite of it straight out of the fridge. You can also freeze it up to 3 months in an air-tight container
We’ve tried both regular Cherry Pie Filling and Dark Sweet Cherry Pie Filling. We’ve used regular here, but the Dark Sweet Cherry Pie filling is super yummy and we use that a lot too.
We normally use Yellow Cake Mix but in a pinch we’ve used White Cake Mix. (And Chocolate Cake Mix Tastes great too!)

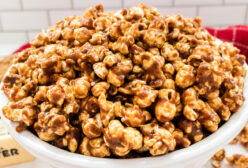
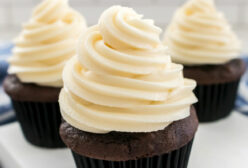
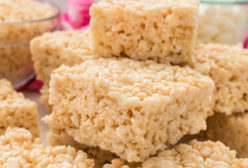
Other Delicious Dessert Recipes You Will Love
Did you Make This Recipe? Leave a review below, then snap a picture and tag @twosisterscrafting on Instagram so we can see it!
And don’t forget to follow us on Pinterest, Facebook, and Instagram!

The Best Ever Cherry Dump Cake
With only three ingredients, this The Best Ever Cherry Dump Cake cobbler-like dessert is a definite family favorite. Over the years, we've tweaked this classic recipe a bit to add a little more flavor but it is still easy peasy to make.
Ingredients
- 1 Box Yellow Cake Mix
- 2 Cans (20 oz.) Dark Sweet Cherry Fruit Filling (20 oz.)
- 1 cup Butter (Sweet Cream, Salted)
Instructions
- Spray a 9x13" pan with cooking spray.
- Pour the contents of both cans of Cherry Fruit Filling into the bottom of the pan. Spread evenly.
- Melt 1/2 cup butter and mix with the Yellow Cake Mix. The cake mix will be crumbly.
- Sprinkle the cake mix mixture evenly over the cherry filling.
- Melt the second 1/2 cup stick of butter and drizzle it evenly over the cake mix.
- Bake the Cherry Dump Cake in a pre-heated 350 degree oven for 30-35 minutes or until top is set.
- Allow to cool slightly.
- Serve warm with a scoop of Ice Cream or Whipped Cream.
Did you Make this Recipe? Leave a review below, then snap a picture and tag @twosisterscrafting on Instagram so we can see it!